Welcome to part one of the amigurumi cat crochet-along! If you haven't already, start by reading the FIRST POST, there's some info about the pattern and a list of all the supplies you'll need.

Today we'll be making the head and ears, embroidering the eyes and nose and sewing the ears to the head.
Skills Required
- Magic ring
- Crocheting in spiral
- Slip stitch
- Single crochet stitch (double crochet stitch in UK and Australia)
- Increasing
- Decreasing
- Finishing an open piece
- Joining two open pieces
- Sewing an open piece to a closed piece
- Sewing a flat piece to a closed piece
Abbreviations
- mr, sc n = magic ring – crochet n (number) single crochet stitches into the adjustable loop.
- sl st = slip stitch.
- sc = single crochet stitch (double crochet stitch in UK and Australia).
- sc n = crochet one sc in each of the next n stitches.
- inc = increase – crochet two single crochet stitches in the same stitch.
- dec = decrease – crochet two stitches together using the invisible decrease method.
- (sc 4, inc) x n = repeat the pattern between parentheses n times.
- [36] = number of stitches in a round after finishing round.
Notes
- Work in a continuous spiral, do not join rounds or turn your work, unless instructed otherwise in the pattern.
- Use a stitch marker or a piece of yarn to mark the end or the beginning of a round. Move the marker up after completing each round.
- All stitches are worked into both loops, unless instructed otherwise in the pattern.
Let's get crocheting! If you'd prefer to follow along with a video, scroll down to the bottom of the post.
HEAD
1: mr, sc 6 [6]
2: inc x 6 [12]
3: (sc, inc) x 6 [18]
4: (inc, sc 2) x 6 [24]
5: (sc 3, inc) x 6 [30]
6: sc, inc, (sc 4, inc) x 5, sc 3 [36]
7: (sc 5, inc) x 6 [42]
8: sc 2, inc, (sc 6, inc) x 5, sc 4 [48]
9-17: sc in each st [48]
18: sc 2, dec, (sc 6, dec) x 5, sc 4 [42]
19: (sc 5, dec) x 6 [36]
Start stuffing the head. Keep adding a bit of fiberfill after every few rounds, stuffing the head firmly.
20: sc, dec, (sc 4, dec) x 5, sc 3 [30]
21: (sc 3, dec) x 6 [24]
22: (sc, dec) x 8 [16]
Sl st in next stitch. Cut the yarn, leaving a long yarn tail for sewing, and fasten off. Stuff the head firmly.
Embroider the eyes, placing the center stitch between rounds 14 and 15, leaving 9 stitches between them. Embroider the nose between the eyes.
Tip! Embroider the face and sew the ears to the head before you sew the head to the body - this way you can fasten all yarn tails securely with a knot under the head.

EARS (make 2)
1: mr, sc 6 [6]
2: (inc, sc) x 3 [9]
3: (sc 2, inc) x 3 [12]
4: sc, inc, (sc 3, inc) x 2, sc 2 [15]
5: (sc 4, inc) x 3 [18]
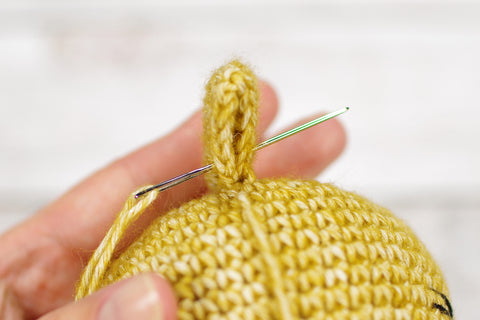
Sl st in next stitch. Cut the yarn, leaving a long yarn tail for sewing, and fasten off. Do not stuff the ears.
Flatten the ears and sew them to the head, placing them just below round 3.

And we have the head done!
If you do not see the video properly, head over to YouTube.
I would love to see how your cats are coming along, use hashtag #kristitullusCAL on Instagram, post a photo to my Facebook page or leave a comment below.
Make sure to come back on Wednesday for part two, where we'll be making the body, arms, legs and tail and assembling the cat.
If you have any questions, do not hesitate to contact me or leave a comment below, I am always happy to help.

PART ONE - BLOG POST and VIDEO
PART TWO - BLOG POST and VIDEO