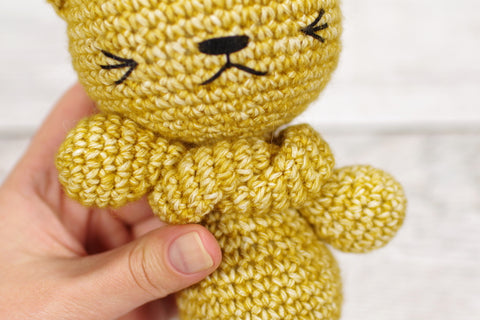
Welcome back for the second and final part of the cat pattern. If you are just joining us, you'll want to check out part one, where we made the head and ears, embroidered the face and sewed the ears to the head. This week we will make the body, arms, legs and tail and then sew the cat together.

Skills required
- Magic ring
- Crocheting in spiral
- Slip stitch
- Single crochet stitch (double crochet stitch in UK and Australia)
- Increasing
- Decreasing
- Finishing an open piece
- Joining two open pieces
- Sewing an open piece to a closed piece
- Sewing a flat piece to a closed piece
Abbreviations
- mr, sc n = magic ring – crochet n (number) single crochet stitches into the adjustable loop.
- sl st = slip stitch.
- sc = single crochet stitch (double crochet stitch in UK and Australia).
- sc n = crochet one sc in each of the next n stitches.
- inc = increase – crochet two single crochet stitches in the same stitch.
- dec = decrease – crochet two stitches together using the invisible decrease method.
- (sc 4, inc) x n = repeat the pattern between parentheses n times.
- [36] = number of stitches in a round after finishing round.
Notes
- Work in a continuous spiral, do not join rounds or turn your work, unless instructed otherwise in the pattern.
- Use a stitch marker or a piece of yarn to mark the end or the beginning of a round. Move the marker up after completing each round.
- All stitches are worked into both loops, unless instructed otherwise in the pattern.
Let's get crocheting!
BODY
1: mr, sc 6 [6]
2: inc x 6 [12]
3: (sc, inc) x 6 [18]
4: (inc, sc 2) x 6 [24]
5: (sc 3, inc) x 6 [30]
6-9: sc in each st [30]
10: sc, dec, (sc 4, dec) x 4, sc 3 [25]
11: sc in each st [25]
12: (sc 6, dec) x 3, sc [22]
Start stuffing the body. Keep adding a bit of fiberfill after every few rounds, stuffing the body firmly.
13: sc in each st [22]
14: sc 2, dec, (sc 5, dec) x 2, sc 4 [19]
15: sc in each st [19]
16: (sc 4, dec) x 3, sc [16]
17-19: sc in each st [16]
Sl st in next stitch. Fasten off and hide the yarn tail. Finish stuffing.
Sew the head to the body. I like to use the mattress stitch.

Add a bit more stuffing before closing the seam.

ARMS (make 2)
1: mr, sc 6 [6]
2: inc x 6 [12]
3: (sc 3, inc) x 3 {15]
4-6: sc in each st [15]
7: (sc 3, dec) x 3 [12]
8: (sc, dec) x 4 [8]
Stuff the hands firmly. Do not stuff the arms.
9-24: sc in each st [8]
Sl st in next stitch. Cut the yarn, leaving a long yarn tail for sewing, and fasten off.
Sew the arms to the sides of the body, one row below the head.

Cross the arms.

Then take the arm that's on top and bend it, going up under the other one.
LEGS (make 2)
1: mr, sc 6 [6]
2: inc x 6 [12]
3: (sc 2, inc) x 4 [16]
4-6: sc in each st [16]
7: (dec, sc 2) x 4 [12]
8: (sc, dec) x 4 [8]
Stuff the feet firmly. Keep adding a bit of fiberfill after every few rounds, stuffing the legs lightly.
9-24: sc in each st [8]
Sl st in next stitch. Cut the yarn, leaving a long yarn tail for sewing, and fasten off. Finish stuffing.
TAIL
1: mr, sc 7 [7]
2-4: sc in each st [7]
Start stuffing the tail. Keep adding a bit of fiberfill after every few rounds, stuffing the tail lightly.
5-22: sc in each st [7]
Sl st in next stitch. Cut the yarn, leaving a long yarn tail for sewing, and fasten off. Finish stuffing.
Sew the legs and tail to the body, placing them just above round three.

Weave in the yarn tails and we're done!

If you do not see the video properly, head over to YouTube.
I would love to see how your cats are coming along, use hashtag #kristitullusCAL on Instagram, post a photo to my Facebook page or leave a comment below.
If you have any questions, do not hesitate to contact me or leave a comment below, I am always happy to help.

PART ONE - BLOG POST and VIDEO
PART TWO - BLOG POST and VIDEO