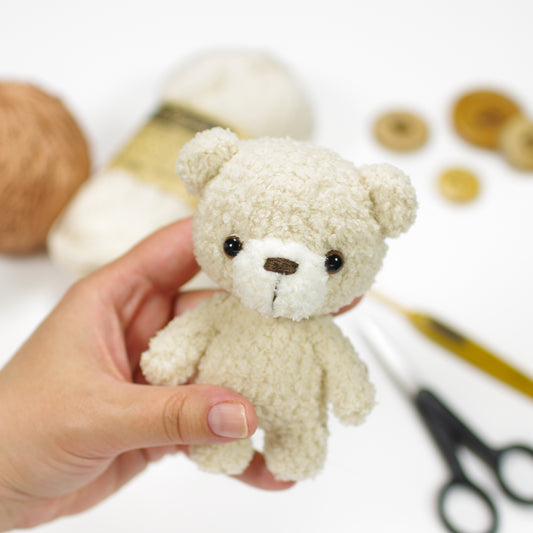
My tiny teddy bear now has a cute little cousin - meet Charlie the panda bear!

There's a free online pattern below or you can get an ad-free printable PDF version with step-by-step photos on ETSY or KRISTITULLUS.COM.

About the Pattern
SiIZE: 10 cm (4") from head to toe, when crocheted with DK weight yarn and a 2.50 mm crochet hook.
DIFFICULTY: Intermediate – includes some more complicated crochet techniques, small details, and simple shaping.
Materials & Tools
- DK / light worsted / sport weight yarn.
- For the dark brown panda I used Alize 'Wooltime' (75% wool, 25% polyamide, 200 m (220 yd) / 100 g (3.53 oz)). You will need about 11 g of white (# 01 cream) and 6 g of brown yarn (# 240 mushroom).
- For the light brown panda I used Cascade Yarns ‘Ultra Pima’ (100% cotton, 200 m (220 yd) / 100 g (3.53 oz)). You will need about 11 g of white (# 3718 natural) and 6 g of brown yarn (# 3828 sandstone). - 2.50 - 3.00 mm crochet hook (US size 2/C - 3/D).
- Polyester fiberfill, wool, etc. for stuffing.
- 6 mm (1/4") safety eyes or buttons, beads, felt, etc.
- Dark brown cotton embroidery floss.
- Yarn needle, scissors, stitch marker.
Skills Needed
- Magic ring
- Crocheting in spiral
- Slip stitch
- Single crochet stitch (double crochet stitch in UK and Australia)
- Increasing
- Decreasing
- Finishing an open piece
- Joining two open pieces
- Sewing an open piece to a closed piece
- Sewing a flat piece to a closed piece
- Crocheting pieces together
Abbreviations
- mr, sc n = magic ring – start with an adjustable loop and crochet n (number) single crochet stitches into the ring.
- ch = chain stitch
- sl st = slip stitch
- sc = single crochet stitch (double crochet stitch in UK and Australia).
- sc (or sl st, ch etc.) n = crochet one sc (or sl st, ch etc.) in each of the next n stitches.
- inc = increase – crochet two single crochet stitches in the same stitch.
- dec = decrease – crochet two stitches together using the invisible decrease method.
- dec (or inc, dbl-inc etc.) x n = crochet n decreases (or inc, dbl-inc etc.) in a row.
- (sc 4, inc) x n = repeat the pattern between parentheses n times.
- (36) = number of stitches in a round after finishing round.
Notes
- Work in a continuous spiral, do not join rounds or turn your work, unless instructed otherwise in the pattern.
- Use a stitch marker or a piece of yarn to mark the end or the beginning of a round. Move the marker up after completing each round.
- All stitches are worked into both loops, unless instructed otherwise in the pattern.

Printable PDF Pattern
You can download an ad-free printable PDF version with step-by-step photos.
Head
With white yarn:
1: mr, sc 6 (6)
2: inc x 6 (12)
3: (sc, inc) x 6 (18)
4: (inc, sc 2) x 6 (24)
5: (sc 3, inc) x 6 (30)
6: sc 6, inc, sc 14, inc, sc 8 (32)
7-8: sc in each st (32)
9: sc 7, inc, sc 4, with brown yarn: sc 2, with white yarn: sc, inc, sc 2, with brown yarn: sc 2, with white yarn: sc 3, inc, sc 7, inc (36)
On round 10 place a stitch marker around the 18th stitch to mark the center of the face. Use it as a guide when placing the eyes.
10: sc 12, with brown yarn: sc 4, with white yarn: sc 3, with brown yarn: sc 4, with white yarn: sc 13 (36)
11: sc 12, with brown yarn: sc 11, with white yarn: sc 13 (36)
12: sc 13, with brown yarn: sc 10, with white yarn: sc 13 (36)
Attach safety eyes to either side of the stitch marker, between rounds 10 and 11, leaving 7 stitches (count 6 holes) between them.
13: sc, dec, (sc 4, dec) x 5, sc 3 (30)
Start stuffing the head. Keep adding a bit of fiberfill after every few rounds, stuffing the head firmly.
14: (sc 3, dec) x 6 (24)
15: (dec, sc 2) x 6 (18)
16: (dec x 3, sc) x 2, dec x 2 (10)
Sl st in next stitch. Cut the yarn, leaving a long yarn tail for sewing, and fasten off. Finish stuffing the head.
Muzzle
With white yarn:
1: mr, sc 6 (6)
2: inc x 6 (12)
3: sc in each stitch (12)
Sl st in next stitch. Cut the yarn, leaving a long yarn tail for sewing, and fasten off. Stuff the muzzle firmly.
Sew the muzzle to the head with whip stitch, placing it just below round 9.
Use yarn to indent the eyes a little.
Embroider the nose with cotton embroidery floss.
Ears
With brown yarn:
1: mr, sc 6 (6)
2: (inc, sc 2) x 2 (8)
3: sc in each stitch (8)
Sl st in next stitch. Cut the yarn, leaving a long yarn tail for sewing, and fasten off. Do not stuff the ears.
Flatten the ears. Sew the ears to the head, placing them just below round 4.
Body
Legs and body are crocheted in one piece. Start by making the two legs first.
With brown yarn:
1: mr, sc 6 (6)
2: (inc, sc) x 3 (9)
3: sc in each st (9)
From here on the right and left leg are crocheted differently.
RIGHT LEG
4: sc in each stitch (9)
Sl st in next stitch. Cut the yarn and fasten off. Stuff the leg firmly.
LEFT LEG
4: sc 4, with white yarn: sc 4 (9)
Do not fasten off, leave the working yarn attached to the left leg. Stuff the leg firmly.
BODY
Join the two legs with a chain on the first round of the body. Then continue crocheting the body around the legs and the chain between them.
With white yarn:
1: Take the left leg and ch 1, take the right leg and continue around it, starting in the next stitch after the sl st: sc 9, sc in next stitch (the stitch where you made the first sc after the chain, total of 2 sc-s in this stitch), sc (into chain), sc in the stitch where you made the last sc before the chain (total of 2sc-s in this stitch), continue around the left leg: sc 9
Now you should have 22 stitches - 10 sc-s on either leg + 1 sc on one side of chain + 1 ch.
2: inc (into chain), sc 4, dec, sc 4, inc, sc 4, dec, sc 4 (22)
3-6: sc in each stitch (22)
Sc in next 12 stitches. Count the last sc as the end of the round from now on.
7: (dec, sc 4, dec, sc 3) x 2 (18)
Start stuffing the body. Keep adding a bit of fiberfill after every few rounds, stuffing the body firmly.
8: sc 6, with brown yarn: sc 12 (18)
9: (dec, sc 3, dec, sc 2) x 2 (14)
10: sc in each stitch (14)
11: (dec, sc 2, dec, sc) x 2 (10)
Sl st in next stitch. Cut the yarn and fasten off. Finish stuffing the body.
Sew the head to the body.
Arms
With brown yarn:
1: mr, sc 6 (6)
2-3: sc in each stitch (6)
Stuff the hands firmly. Keep adding a bit of fiberfill after every few rounds, stuffing the arms lightly about half way up.
4-7: sc in each stitch (6)
8: sc 3, flatten the top and sc through both layers (3)
Cut the yarn, leaving a long yarn tail for sewing, and fasten off.
Sew the arms to the sides of the body, one row below the head.


Copyright © 2025 Kristi Tullus, TÜ Spire. All rights reserved.
You may not sell, copy, reproduce, alter, publish, or distribute this pattern, or parts of this pattern in any way. You are welcome to sell finished items made with any of my patterns.
* Some links may be affiliate links, allowing me to make a small commission on any products purchased using one of these links at no extra cost to you. This does not influence my opinion or recommendations in any way. Thanks for your support.