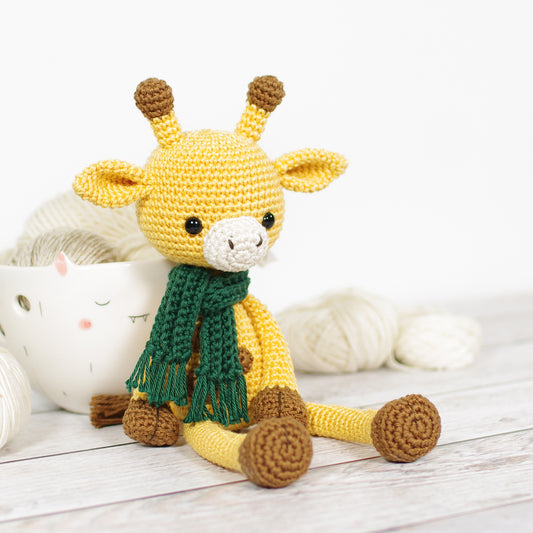
These bunnies are a huge crowd-pleaser with their long dangling legs and large floppy ears.
There's a free online version of the pattern below or you can get an ad-free printable PDF version with step-by-step photos on ETSY or KRISTITULLUS.COM.


ABOUT THE PATTERN
Size: 27 cm (10 2/3"), when crocheted with sport weight cotton-acrylic blend and a 2,50 mm hook.
Difficulty: beginner – works up using just single crochet stitches, includes some less common crochet techniques.
YOU WILL NEED
- Yarn. I used Scheepjes 'Stone Washed', a sport weight cotton and acrylic blend, 130 m (142 yd) / 50 g (1.76 oz) / 12 wpi / 2: fine. You will need about 68 g or 177 m of yarn.
- 2,50 - 3,00 mm crochet hook (US size 2/C - 3/D).
- Polyester fiberfill, wool, etc for stuffing.
- 9 mm (3/8") safety eyes or buttons, beads, felt, etc.
- Cotton embroidery floss for the nose.
- Yarn needle, scissors, stitch marker.
SKILLS REQUIRED
- Magic ring
- Crocheting in spiral
- Slip stitch
- Single crochet stitch (double crochet stitch in UK and Australia)
- Crocheting an oval around a chain
- Increasing
- Decreasing
- Finishing an open piece
- Finishing a flat piece
- Joining two open pieces
- Sewing an open piece to a closed piece
- Sewing a flat piece to a closed piece
ABBREVIATIONS
- mr, sc n = magic ring – crochet n (number) single crochet stitches into the adjustable loop.
- ch = chain stitch.
- sl st = slip stitch.
- sc = single crochet stitch (double crochet stitch in UK and Australia).
- sc (or sl st, ch etc.) n = crochet one sc (or sl st, ch etc.) in each of the next n stitches.
- inc = increase – crochet two single crochet stitches in the same stitch.
- dbl-inc = double increase – crochet three single crochet stitches in the same stitch.
- dec = decrease – crochet two stitches together using the invisible decrease method.
- dec (or inc, dbl-inc etc.) x n = crochet n decreases (or inc, dbl-inc etc.) in a row.
- (sc 4, inc) x n = repeat the pattern between parentheses n times.
- (36) = number of stitches in a round after finishing round.
NOTES
- Work in a continuous spiral, do not join rounds or turn your work, unless instructed otherwise in the pattern.
- Use a stitch marker or a piece of yarn to mark the end or the beginning of a round. Move the marker up after completing each round.
- All stitches are worked into both loops, unless instructed otherwise in the pattern.
HEAD
1: mr, sc 6 (6)
2: inc x 6 (12)
3: (sc, inc) x 6 (18)
4: (inc, sc 2) x 6 (24)
5: (sc 3, inc) x 6 (30)
6: sc, inc, (sc 4, inc) x 5, sc 3 (36)
7: (sc 5, inc) x 6 (42)
8: sc 2, inc, (sc 6, inc) x 5, sc 4 (48)
9: (sc 7, inc) x 6 (54)
10-19: sc in each stitch (54)
20: (sc 7, dec) x 6 (48)
21: sc 2, dec, (sc 6, dec) x 5, sc 4 (42)
Attach safety eyes between rows 17 and 18, leaving 11 stitches (count 10 holes) between them.
Start stuffing the head. Keep adding a bit of fiberfill after every few rounds, stuffing the head firmly.
22: (sc 5, dec) x 6 (36)
23: sc, dec, (sc 4, dec) x 5, sc 3 (30)
24: (sc 3, dec) x 6 (24)
25: (dec, sc) x 8 (16)
Sl st in next stitch. Cut the yarn, leaving a long yarn tail for sewing, and fasten off. Finish stuffing the head.
Embroider the nose with cotton embroidery floss.
BODY
1: mr, sc 6 (6)
2: inc x 6 (12)
3: (sc, inc) x 6 (18)
4: (inc, sc 2) x 6 (24)
5: (sc 3, inc) x 6 (30)
6: sc, inc, (sc 4, inc) x 5, sc 3 (36)
7-11: sc in each stitch (36)
12: (sc 10, dec) x 3 (33)
13: sc in each st (33)
14: sc 4, dec, (sc 9, dec) x 2, sc 5 (30)
Start stuffing the body. Keep adding a bit of fiberfill after every few rounds, stuffing the body firmly.
15: sc in each st (30)
16: (sc 8, dec) x 3 (27)
17: sc in each st (27)
18: sc 3, dec, (sc 7, dec) x 2, sc 4 (24)
19: sc in each st (24)
20: (sc 6, dec) x 3 (21)
21: sc in each st (21)
22: (sc 2, dec) x 5, sc (16)
23: sc in each st (16)
Sl st in next stitch. Cut the yarn and fasten off. Stuff the body firmly.
Sew the head to the body with mattress stitch.

Printable PDF Pattern
You can download an ad-free printable PDF version with step-by-step photos.
BUY NOW
EARS
1: mr, sc 6 (6)
2: inc x 6 (12)
3: (sc, inc) x 6 (18)
4: (inc, sc 2) x 6 (24)
5: (sc 3, inc) x 6 (30)
6: sc, inc, (sc 4, inc) x 5, sc 3 (36)
7-8: sc in each st (36)
9: (dec, sc 16) x 2 (34)
10: sc in each st (34)
11: (dec, sc 15) x 2 (32)
12: sc in each st (32)
13: (dec, sc 14) x 2 (30)
14: sc in each st (30)
15: (dec, sc 13) x 2 (28)
16: sc in each st (28)
17: (dec, sc 12) x 2 (26)
18: sc in each st (26)
19: (dec, sc 11) x 2 (24)
20: sc in each st (24)
21: (dec, sc 10) x 2 (22)
22: sc in each st (22)
23: (dec, sc 9) x 2 (20)
24: sc in each st (20)
25: (dec, sc 8) x 2 (18)
26: sc in each st (18)
27: sc, flatten the top and sc through both layers.
Cut the yarn, leaving a long yarn tail for sewing, and fasten off.
Sew the ears to the sides of the head, placing them just below round 12.
ARMS
1: mr, sc 6 (6)
2: inc x 6 (12)
3: (sc 2, inc) x 4 (16)
4-6: sc in each st (16)
7: (dec, sc 2) x 4 (12)
8: (sc 4, dec) x 2 (10)
Stuff the hands firmly. Keep adding a bit of fiberfill after every few rounds, stuffing the arms lightly about half way up.
9: sc in each st (10)
10: sc 4, dec, sc 4 (9)
11-12: sc in each st (9)
13: sc 4, dec, sc 3 (8)
14-21: sc in each st (8)
22: sc 5, flatten and sc through both layers
Cut the yarn, leaving a long yarn tail for sewing, and fasten off.
Sew the arms to the sides of the body, one row below the head.
LEGS
The first round is crocheted around a foundation chain.
1: ch 7, 2 sc in 2nd ch from hook, sc 4, 4 sc in first ch
Rotate and work on other side of beginning chain.
sc 4, 2 sc in last ch (16)
Continue crocheting in spiral.
2: inc, sc 5, dbl-inc, sc 2, dbl-inc, sc 5, inc (22)
3: dbl-inc, sc 7, dbl-inc, sc 4, dbl-inc, sc 8 (28)
Work round 4 in back loops only.
4-5: sc in each st (28)
6: sc, dec, sc 25 (27)
7: sc 9, dec x 6, sc 6 (21)
8: sc 4, dec, sc 3, dec x 3, sc 3, dec, sc (16)
9: sc 7, dec, sc, dec, sc 4 (13)
10: sc 6, dec x 2, sc 4 (12)
Stuff the feet firmly. Keep adding a bit of fiberfill after every few rounds, stuffing the legs lightly.
11: sc in each st (12)
12: sc 7, dec, sc 3 (11)
13: sc in each st (11)
14: sc 7, dec, sc 2 (10)
15-29: sc in each st (10)
30: (sc, dec) x 3, sc (7)
Sl st in next stitch. Cut the yarn, leaving a long yarn tail for sewing, and fasten off. Finish stuffing the legs.
Sew the legs to the body, placing them just above round 5, leaving 8 - 9 stitches (count 7 - 8 holes) between them.
TAIL
1: mr, sc 6 (6)
2: inc x 6 (12)
3: (inc, sc 2) x 4 (16)
4: (sc 3, inc) x 4 (20)
5-6: sc in each st (20)
7: (sc, dec x 2) x 4 (12)
Sl st in next stitch. Cut the yarn, leaving a long yarn tail for sewing, and fasten off. Stuff the tail firmly.
Sew the tail to the body, placing it just above round 5.

If you have any questions, do not hesitate to email me or leave a comment below, I am always happy to help.
Copyright 2012 Kristi Tullus, TÜ Spire. All rights reserved.
Please do not post this pattern to your website or blog, instead, post a link to https://kristitullus.com/blogs/news/free-pattern-long-legged-bunny. You MAY use this pattern as a teaching aid in any free class or e-course, provided you credit me as the designer (Kristi Tullus, http://kristitullus.com).
Feel free to sell items made with this pattern.
* Some links may be affiliate links which will allow me to make a small commission on any products purchased using one of these links with no extra cost for you. This does not influence my opinion or recommendations in any way. Thanks for your support.