A magic ring or a magic circle is a way to begin crocheting in round by crocheting the first round into an adjustable loop and then pulling the loop tight. This is great way to start crocheting your toys, because you can pull the loop very tight so you won't have a hole in the middle of your first round.
Alternatively you can chain 2 and then crochet the first round into the second chain from hook.
Amigurumi pieces usually start with six single crochet stitches, so this is what I'm using as an example here.
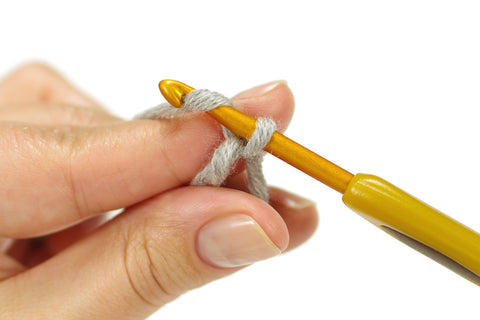
1. Make a loop so the working yarn goes over the yarn end.

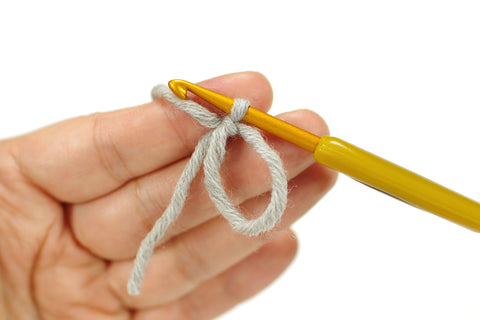
2. Grab the join between your thumb and forefinger. Insert the hook through the loop, grab the yarn and draw up a loop.

3. Yarn over and draw through the loop on the hook.
4. Pull the stitch tight. This does not count as the first single crochet stitch.
5. Start your first single crochet stitch. Insert the hook through the loop, yarn over and draw up a loop.

6. Yarn over and draw through both loops on the hook...

7. ... completing your first single crochet stitch.

8. Continue crocheting through the loop and over the yarn tail until you have the required number of stitches, usually six.

9. Grab the yarn tail and pull until the center is tightly closed.

10. And done! You can now continue with the second round.

If you do not see the videos properly, head over to YouTube.
If you have any questions, do not hesitate to contact me or leave a comment below, I am always happy to help.