A lot of amigurumi toys include flat pieces like ears, wings, flippers or partially flat pieces like the top of the arms. Just like the rest of your toy, the flat pieces start with a magic ring and are crocheted in spiral. Except, after you finish them, you push them flat and don't add any stuffing.
Tip! Flat pieces can also be crocheted in rows, but I prefer making them in rounds - this way the edge will look nicer and the pieces are sturdier.
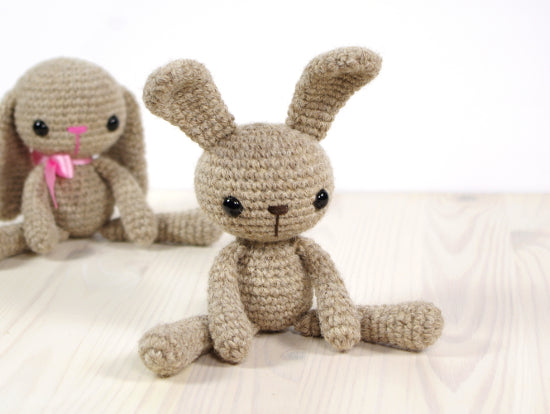
How to finish your flat piece depends on whether you want it to stand up or lay against the larger piece once it's sewn on. For example: here the straight bunny ears are finished one way and the floppy ears and arms are finished the other way. The way you sew them on also matters, I will talk about it in the next post.
Every flat piece starts with a magic ring and is crocheted in spiral. Depending on what you are making, it can look like a bowl (teddy ears), a long tube getting narrower towards the opening (bunny ears), a cone (cat ears), an almond shape (wings) or any other tube shape, closed at the bottom. The other end is usually left open.
I am making a small bunny ear, this is what it looks before flattening it:


Log Details About Your Projects!
Project journals are a great way to stay organized and keep track of all your unfinished projects.
SEE MORE
Straight ears
Finishing pieces you want to stay up is very simple - just slip stitch in next stitch and fasten off, just like you would finish any other amigurumi piece, and then flatten the piece.
1. Slip stitch in next stitch and fasten off.

2. Starting from the open end, push the edges of the opening together, flattening the top.

3. And then flatten the whole piece.

Floppy ears
But if you want your piece to lay flat against the larger piece, push the top flat and crochet over the opening with single crochet stitches (double crochet in UK and Australia).
1. Finish the piece, but don't fasten off. Push the piece flat.

2. Insert your hook through both layers, skipping the last stitch.

3. Yarn over and draw up a loop. Yarn over and draw through both loops on the hook.

4. Crochet over the whole opening.

5. Cut the yarn and fasten off.

If you do not see the videos properly, head over to YouTube.
If you have any questions, do not hesitate to email me or leave a comment below, I am always happy to help.